Frontier Campfires, Then and Now
- Dave Rodgers

- Jan 2
- 15 min read
The campfire is one of history's greatest outdoor traditions. Here are some quick tips for the next generation of frontiersmen from managing the fire to cooking just as our Old West ancestors did.


Dave Rodgers is Chief Editor of the Frontier American Illustrated News. He is a tribal member and westerner descended directly from Squire and Edward Boone (father & brother of Daniel Boone). With an old-west family lineage of farmers, ranchers, railway men, lawmen and desperadoes, he takes pride in the rich story of the land his family came from. As a resident of rural Arizona, he continues in the traditions of the American West and promotes the western culture as it continues on today.


Having spent my life in the American Southwest, I've seen some amazing country. Everywhere you go, there are grand vistas to be seen from the saddle or hiking trails. Truly, I thank God for moments like this, to be in the presence of such majestic beauty with good friends. From working cowboys and modern outdoorsmen, to the Old-West living history reenactors who keep history alive, the two things we all share is the love of the natural world and the community building that happens in the comforting glow of a good fire.
You can tell a lot about an outfit by the way that they gather round the evening fire pit. Show me one guy sitting in the somber glow of the evening coals while everyone else is scattered about, and I'll show you a company of strangers. Strong, rugged individuals become teams through hard work like driving herds and riding over difficult terrain, but around the fire is where a team becomes a tribe. Such a bond is important to have with those whom you ride with and little has changed about campfires between now and the nineteenth century frontier. After a long day, a good fire is still a mesmerizing portal into deep reflection, as well as being your greatest tool for warmth, food, and protection.

Traditional Method of Fire Starting

Starting the Fire - There are many articles on fire starting and I'd prefer to dedicate an article to each of those methods rather than get into it here, but I will go over the basics. You will need these four steps to start your fire and those are: Punk - Tinder - Kindling - & Fuel. Here is a step by step description.

Punk or "Charcloth" - This is for the "flint & steel" method. The most common forms are to take soft, spongy rotten wood 'punk-wood' or discarded cotton cloth and set it on fire. Once it is fully involved, smother it. Another method is to seal the cloth or punk-wood in a pressed metal box. Put the pressed metal box into the fire and wait for the smoke escaping from the seams to stop igniting. Once the box is cooled, remove the charcloth or punk wood. This will take a spark struck off the flint & steel, to turn into an ember to ignite your tinder.

When using fire sticks such as a bow & spindle - No punk is needed. The grinding motion of the spindle on the fireboard produces a pile of fine sawdust that is superheated into a burning coal by the constant friction. From there, add it to a 'nest' of tinder to stoke into flame. One hand presses down the thimble (top) which keeps the spindle vertical. The sawing motion of the bow allows the contact between the spindle and fireboard to produce carbonized sawdust that exceeds the flashpoint. The coal is caught on a small shingle below the notch in the fireboard as shown in the illustration.

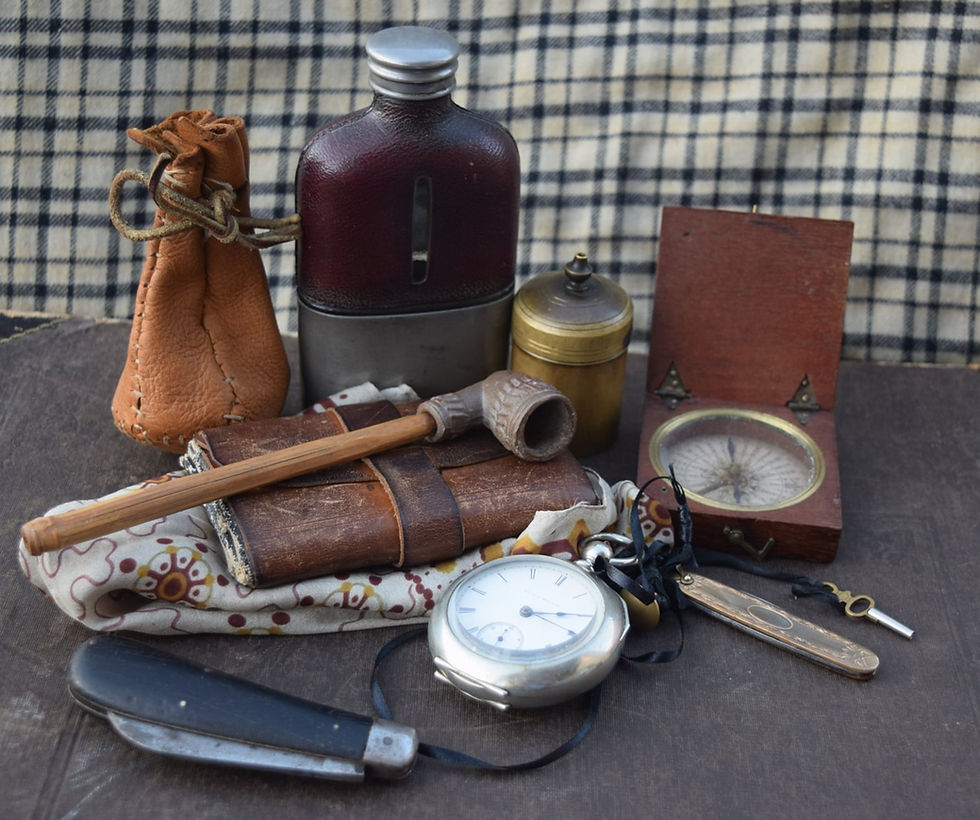
Spunks and Matches - The spunk (pictured with the tinder box - above), is an early form of match which is a wood sliver, dipped in melted Sulphur. Press the spunk to a burning ember and it ignites, starting your fire. Modern matches gained in commercial success during the 1820-30's. By the 1850s, they had surpassed the tinder box in common use.
Keeping Matches Dry - Fancy wood or paper match-boxes will soak up moisture and ruin matches in the humid air and in sweat-stained pockets. The pioneers carried them either in empty glass medicine bottles, metal or gutta-percha matchsafes.
Transporting Matches in Bulk - A large tin box full of matches would be rolled up in a long strip of dressed deer hide and tied firmly.
Drying a Wet Match - When damp, the sulfur 'Lucifer' match may be run through clean, dry hair to have its functional dryness restored.

Tinder - This is the nest that holds your coal and the heart of your fire. Dried fibrous materials such as dried lichen, grass, pulverized dry vines or cedar bark. This ignites easily, setting light to the kindling.
Kindling - This is the light, fast-burning material to get the fire started. It ranges from the thickness of a matchstick to that of a human finger. It is best to use small kindling to start the larger kinding sticks.
Fuel - Hardwood is Usually Best. Generally, a hardwood (broadleaf) is preferred over softwoods (conifers) but sometimes broadleaf trees such as the willow are the worst kind of cooking & heating wood. On other occasions, a softwood such as Cedar breaks the rules and proves to be a good fuel. The preferred characteristics of firewood is a slow burn speed that generates a good amount of heat yet burns clean, and leaves lasting coals. It also does not crackle, spit, or give off sparks.
The best woods for fires are Ash, Beech, Apple, Cherry, other fruit-woods, Cedar, Hickory, Sugar Maple, or Hawthorne. In the Southwest, Mesquite is the proven favorite for the deserts and plains.
The Ash Tree - This tree deserves special mention. It is not that common in the wild east of the Rockies, but it is among the best fuels because it has low smoke output, burns relatively clean with high heat output on a slow burn, with lasting coals. It is also one of the few woods that can be burned green.
Decent woods are Maple, Alder, or Birch. These woods still burn well and will serve you just fine in cooking a meal or keeping warm, although they are not necessarily the best for efficient burn or their coal bed.
THE BEST FIREWOODS BY REGION
Best Northern Firewood – Hickory
Best Southern Firewood – Live Oak
Best Fuel of the Prairies – Buffalo Chip & Greasewood
Best Fuel of the Western States – Var. Oak & Cedar
Best Southwestern Desert Firewood - Mesquite

Prairie Fuel, the Cow-pie or Buffalo-chip “This is the name given by Western traders to the immense quantity of buffalo ordure found scattered over the surface of the prairie. When dry and ignited it gives out a strong heat, emits little offensive smell, and answers the purpose of a wood fire very well. The hunter throws his meat upon the coals, or places it upon his gunstick and holds it over the fire in either case it is well cooked.”- Geo. Wilkins Kendall (1844)

WHEN YOU ONLY HAVE POOR FUEL WOOD TO BURN
Poor burning wood should only be used as a last resort. It is typically difficult to keep lit, or may burn out too fast. It will definitely smoke heavy, spit, spark too much, and heat insufficiently. It will also not leave a long-lasting coal bed.
Examples of poor firewood are Pine, Chestnut, Fir, Holly, Poplar, Spruce, or Willow. It’s also important to note that this kind of wood’s ash does not contain enough lye to make soap, or fortify Indian meal. (Stick to using good burning hardwood ash for this.)
*Interesting Fact: Although willow is a poor firewood, it makes a superb charcoal of such quality that it can substitute coal in a blacksmith's forge should supplies run low.
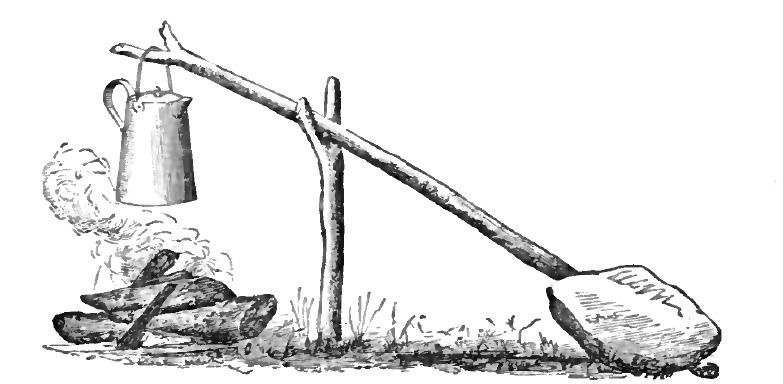
Protect your tinware against soot - Hang coffee pots and boilers over the coals. A cooking-arm (above) for hanging a kettle or coffee-pot keeps the tin out of the flames but over the coals where it will be properly heated. A stone or log counterweight depresses one end of the arm, so that the other end from which the bale attaches will properly hang the pot. This is ideal for when only poor-quality cooking wood is on hand or there are no fire dogs.
Blackened tin comes from choosing poor fuel and taking no precaution against the accumulation of soot. The build-up of soot or "smut" interrupts the communication of heat through the metal. While the water will inevitably heat, it takes a longer time to do so with blackened tin and that means wasted fuel when cooking.
Additionally, poor, sooty fuels like pine will also impart a poor taste into the pan or tin dipper’s contents. Soot also accelerates the degradation of metal, shortening the life of the tin-plate and sheet metal beneath.
Coating Tinware against soot (blacking) Before cooking, rub the outside tin with a Castille soap bar or some finely rendered grease. Then put it to a fire of resinous wood. This allows the soot to be carried away more easily when cleaning afterward. Pinewood soot also gets foul-tasting sap smoke into the coffee, tea, porridge, or stew.
Never place in the flame but over the coals. Putting the tinware directly into the fire destroys the solder, causing the vessel to fall apart at the seams.
HOW TO TELL WHEN WOOD IS DRY
With the exception of Ash, few woods burn green. Wood must be well cured but whole for practical use which is why fresh-dried dead-fall is an ideal fuel for a camp fire but rotten deadfall is not suitable at all.

The best time to cut evergreens for firewood is in the late winter or early spring. It will cure nicely over the next 6-months. Wood cut after late spring will age poorly and be unfit by winter time. Beech is best when cut in August but the quality of the wood will be better still if you allow the branches to remain attached for another month. At least 6-months should be allowed for proper curing. Most firewood cut by spring time may be ready for the coming fall and winter but the author still recommends allowing 9-months to cure. For optimal hardwoods such as Oak, Hickory, Mesquite, or fruit-wood, it is preferable to age at least a year.
Wood darkens with age. White woods turn gray. Cream woods turn dark yellowish. Green (wet) wood is heavy and dull in sound when struck. Dry wood rings hollow when struck together. Dry wood is not aromatic; only wet wood still smells of the forest.
WHY SMOKE FOLLOWS YOU

When smoke follows you, it is just physics - When you stand or sit within close proximity to a fire, your body creates an updraft that draws the smoke to you. If you create a campfire and add smoky material such as pine needles or green-bark, it will create a strong smoke plume that will actually follow you as you walk slowly around the firepit. Even with the wind to your back, you may notice that the smoke forms into vertical eddies rolling up your chest and face.


How to prevent smoke from attracting to you - Choose a fuel that is not as smoky. Stay low, warming your feet & legs instead of your chest. Keep your face back & away from the fire light to avoid the smoke. If it draws to you anyway, hold out the palm of your hand, upright and facing the fire. Smoke will trace up your hand instead of your chin.
If there is a lot of smoke, try holding your hat with the brim and hatband facing the fire as shown below. By holding the brim or crown, you present a flat surface out in front of you to attract the air current carrying the smoke.
It is best to have a small fire on the frontier - A large fire can attract unwanted attention from a hostile visitor when traveling through disputed country. A small fire may be had in a small depression where its glow will not easily be seen. If an enemy approaches, a small fire is doused with a pail of dirt without leaving a trace of smoke. Small fires also consume less fuel and are easier to keep through the night. Smaller fires produce less light which is beneficial to preventing loss of night vision.

Build a reflector backing - The smoke from a fire built against the wall of a bank of a dried streambed or at the base of a large tree, will trace up the side of that surface just like a chimney. A "Reflector" fire-build will direct the smoke up its back-wall while reflecting the heat of the fire from its face into your direction. This gives you the benefit of amplified heat while drawing smoke away from you just like a chimney does.
A USEFUL CAMP FIRE
There are a lot of 'little pleasures' in this life that mean a lot to most folks I know. Picture the smell of a coal farrier's forge, morning bacon & coffee, cool water on a heated neck or a warm fire to ward off the cold. My personal favorite is the grinning faces of old friends emerging from the dark into the firelight's glow. That will remain to me and most folks I know, one of the fondest of such moments.

3-BASIC TYPES OF CAMPFIRE BUILDS
(There are more but start with these.)

The Crossed-Log (Log Cabin) Build (Top) is the most utilitarian fire build that I use. It is the best for nearly every occasion. It can be made into a large fire using logs or as a smaller trapper’s fire using wrist-thick sticks and deadfall or quartered cord-wood. The bottom-layer serves as fire-dogs to draw airflow. This build will create a good coal bed quickly. A small pile of kindling and splinters over tinder in the center within the ‘walls’ of the log cabin ensures a fire when lighting with friction-sticks or flint. This may be stacked a few tiers high depending on the fuel. Spaces between the logs draw airflow to increase the core of the fire’s heat.
A Conical Build (Center) is a series of shaved sticks and twigs gathered over a core of tinder. It easily lights by punk or match and forms a good base from which to grow a fire either into a sunburst or crossed-log fire build. A large conical fire can serve as a council fire for gatherings. The shape channels the flames to rise higher, giving a brighter light which is ideal for signaling or illuminating an area.
The Sunburst Build (Bottom) is good for starting a fire and serving as a small cook fire beneath a tripod or to warm a meal for small parties. Kindle a fire of tinder and twigs, while laying over progressively thicker sticks in a crossed "starburst" manner. It works best as a small fire for small parties traveling light.
A CAMPFIRE EXERCISE TO PRACTICE ON YOUR OWN

You can do this in your own back yard or on the next camping trip. Do this often so that you can prepare a meal quickly and neatly while the greenhorns will make a mess of their own firepits. Start off with a good fuel wood like the mesquite I like to use here in rural Arizona.
First, start your fire - as it flares up, here is a good time to make charcloth. Place 100% cotton cloth in an unsoldered tin box that goes straight into the flames. As the cloth chars within the tin box, the gases will escape and burn like a flare. Once the "flare" stops, get out your tongs and remove the tin box.

Roast Your Coffee in a skillet. Some use a small lump of butter or animal grease to ensure an even parch and roast. Use a wood spoon to stir the beans incessantly through the entire roasting process until dark brown and greasy on the surface but not blackened.
A Light Roast or ‘gold-roast’ occurs when roasting for four minutes until a ‘crackle’ will sound.
For a Dark Roast, it is preferable to roast 7-15 minutes. A darker roast is more flavorful, but a lighter roast has more caffeine.
Toss the roasted beans in a colander, bowl or sieve to remove the chaff. Now, grind the coffee beans while still warm for the best flavor. Grind in a hand-mill, it will require about 200 turns for grounds sufficient to boil a 1-quart pot. If a mill is not available, coffee may be ground between a flat, or “bowl”-stone and hammer-stone just like a mortar and pestle or metate. Boil - mix ¾ to 1 ounce of ground coffee to each pint of water. When boiling, the vessel should be about ⅔ full to avoid boiling over. Offset the coffee pot so that one edge is over the coals and the opposite edge under the handle is not to allow a rolling boil without having the contents boil up over the rim as will happen when the pot is surrounded and bedded in coals.

Bacon – Trim the rinds from the slices and set them aside. Use a slice to grease the pan and fry or fill the pan with water to about 1/8 inch deep. As the water evaporates it helps leech out some salts and ensure that the meat is evenly cooked. Fry the rinds in grease to make cracklins.
*Note: The picture shows bacon sitting on stone firedogs. A knife or poker is used to keep an airway between the coals and the bottom of the pan for optimal heating,

A Common Traveler’s Pancake - Mix dry, an army boiler-full (2 cups) of flour with ½ tsp. of salt, and 2 ½ tsp. of baking powder. Mix in water to make a batter and fry on a lightly greased pan. Wait till the sides bubble before flipping or tossing in the pan.
Simple Syrup - Mix equal parts sugar and water while warming over a slow flame. Just as it starts to bubble, it is ready.

Butter Substitute - Take bacon drippings or other cooking grease salted to taste. Thicken it with a mixture of flour and milk if available.
BISCUITS - Mix dry, 2-cups of flour with one level and one heaping teaspoons of baking powder with ½ teaspoon of salt. Mix in just water or milk or both to form a stiff dough. It must be stiff enough to be well worked with floured hands. Roll into ½ inch

thick biscuits put into a greased pan that may be baked until browned. Another method is to brown in a lightly-greased frypan and fry the bottoms first. Next, tilt the pan upright before a reflector-fire and bake as shown in the illustration.
Baking Biscuits Without an Oven: Cut your biscuits by pressing the open end of a tin cup or can straight down. Never grind side to side. Place them in a lightly greased frypan to set the bottoms, then tilt up the frypan close to the heat so that the biscuits can bake without an oven.
Step-by-Step Review of Fire Starting


The Campfire Spirit

Always treat this as a special time during your camp-out, round-up or backyard gathering. Since ancient times, the fireside has been a cherished rite for bonding and fellowship. Through the ages, this has been a shared practice across time, lands, and cultures...
...and now it's yours.
See you on the other side of the fire smoke.
-DR